When you build or install custom woodwork around an appliance, things can get tricky—especially when that appliance needs ventilation. Appliances like dryers, microwaves, or range hoods give off heat, steam, or fumes.
If they’re not vented the right way, it can cause problems like damage to the wood, poor air quality, or even fire risks. That’s why knowing how to vent safely is so important.
In this post, we’ll walk through how to vent appliance safely in custom woodwork and ensure your appliances stay safe and your woodwork lasts. You don’t need to be a pro to understand this—we’ll keep things clear and helpful, step by step.
Key Takeaways
- Appliances Need Space to Breathe
Always leave enough room for air to flow around the appliance. This helps it work properly and stay cool. - Use the Right Venting Materials
Choose materials made for heat and moisture, like metal ducts or vent-rated plastics—not regular wood or soft tubing. - Plan the Vent Path Early
Think about where the air will go before you build. It’s much easier to plan around a vent than to fix it later! - Seal Gaps, But Don’t Block Flow
Seal around the vent edges to stop leaks, but never cover the vent opening. The air needs a way out. - Check Codes and Manuals
Local building codes and the appliance manual will tell you what’s safe and allowed. Don’t skip this step.
Why Venting Matters: Hidden Dangers Behind Beautiful Design
Custom woodwork can make a kitchen, laundry room, or workshop look really nice. Cabinets fit perfectly. Panels match your walls or trim. Everything looks neat and built-in. But there’s something you can’t always see—what’s going on behind the wood.
If there’s an appliance inside, like a dryer or a built-in microwave, that appliance might need to vent heat, steam, or even smoke. If it can’t do that safely, small problems can turn into big ones.
Let’s look at why good venting is so important.
1. Heat Can Build Up
Appliances like ovens, dryers, and some fridges give off heat when they run. That heat needs somewhere to go. If the heat gets trapped inside the woodwork, it can cause damage. Over time, the wood might dry out, warp, or even crack. And if the appliance gets too hot, it can stop working or become a fire hazard.
Example: A clothes dryer in a tight wooden cabinet with no vent space can overheat and wear out faster.
2. Moisture Can Create Mold or Rot
Some appliances push out steam or damp air. This is common with dryers, dishwashers, and over-the-range microwaves. If that moisture doesn’t have a clear path out, it can build up inside the woodwork. That trapped moisture can lead to mold, mildew, or wood rot. And nobody wants that in their home.
Example: A microwave that vents steam into a closed cabinet space can make the wood inside swell or smell over time.
3. Smoke and Fumes Can Stay Trapped
Cooking appliances like stoves and range hoods often need to move smoke, odors, and cooking fumes out of the house. If vents are blocked or not connected properly, those fumes can stay in the room. This can make the air feel stuffy or even cause breathing problems over time.
Example: A custom hood cover that looks great but blocks the fan duct can stop smoke from escaping while you cook.
4. Poor Air Flow Can Harm the Appliance
Most appliances are designed to work with a certain amount of air flow. If they don’t get enough, they can run harder than they should. That means they might use more power, break down sooner, or work less efficiently.
Example: A fridge with wood panels all around it but no space for air to move might get warm and work too hard to stay cool.
5. Safety Comes First
In some cases, poor venting can even be dangerous. Gas appliances, like some ovens or water heaters, need proper ventilation to release carbon monoxide. This gas is invisible and has no smell, but it can be harmful if it builds up inside.
Example: A gas dryer in a sealed cabinet without a proper exhaust line could leak dangerous fumes into the room.
The Bottom Line: Venting matters because it keeps your appliances working, your woodwork in good shape, and your home safe. It’s not just about how things look—it’s also about how they function behind the scenes. When you plan ahead and follow venting rules, you protect both your style and your safety.
How to Vent Appliances Safely in Custom Woodwork
When you install an appliance inside custom cabinetry, safe venting is a must. The way you set up your vent affects how well the appliance works and how long your woodworking lasts.
Let’s walk through some tips and tricks to make sure your kitchen vent or dryer duct works safely and efficiently. Each one plays a big part in keeping your space both functional and good-looking.
1. Use metal ducting instead of flexible plastic hose
Metal ducting is stronger and safer than flexible plastic. It resists heat better and is easier to clean. Flexible hoses can sag or trap lint, which increases fire risk—especially behind a cabinet door where heat can build up.
If you’re installing a kitchen hood or dryer, always go with rigid metal for better airflow and safety. It’s a smart move in any remodel, no matter the appliance.
- Choose rigid or semi-rigid metal ducting for safety and durability.
- Avoid plastic hoses—they can melt or catch lint.
- Use smooth interior surfaces to improve airflow.
- Check local code to make sure the duct type is approved for your appliance.
2. Route vents straight with minimal bends or turns
A straight path lets air move fast and smooth. Too many turns or bends slow the air down. That puts extra work on the blower and reduces the system’s cfm (cubic feet per minute), which is how we measure air flow.
Whether you’re working with a vent hood insert or a dryer, keep bends to a minimum. If you must turn, use wide, smooth curves—not sharp corners behind your kitchen cabinet.
- Plan the shortest, straightest path from the appliance to the exit.
- Use wide, smooth elbows if you need to make a turn.
- Avoid sharp angles that reduce airflow and increase strain.
- Test airflow after install to check for restrictions.
3. Keep vent ducts as short as physically possible
Shorter ducts move air better. The longer the duct, the harder the appliance has to work. This matters if your vent hood or dryer connects to an exterior wall that’s far away.
In a tight space, especially behind custom cabinetry, plan ahead. Try to make a vent path that’s direct and simple. This also leaves more clearance inside your woodwork, which helps everything fit and function.
- Shorter duct runs reduce the load on your fan or motor.
- Position appliances closer to the exterior wall when possible.
- Limit extra ducting behind or above cabinets.
- Use fewer connectors to keep the run simple and smooth.
4. Seal all duct joints with foil tape, not duct tape
Despite the name, regular duct tape doesn’t hold up well on ducts. It peels over time and can let air escape. Foil tape is heat-safe and sticks firmly to metal.
Use it on every joint, elbow, or connection inside your kitchen hood vent system or dryer exhaust. This keeps air flowing where it should—and helps avoid leaks inside the walls or cabinetry.
- Use UL-listed foil tape rated for high heat.
- Press tape firmly over clean, dry metal surfaces.
- Cover every seam, joint, and elbow to stop air leaks.
- Avoid cloth or plastic tapes—they break down over time.
5. Install a backdraft damper at the exterior exit
A backdraft damper keeps outside air and pests from coming back into your house. It opens when air flows out and closes when it stops. You’ll find these at the end of the duct on the exterior wall.
Whether you’re working on a new vent hood system or adding a hood vent above your stove, this small part makes a big difference. It protects your vent from wind, bugs, and cold drafts.
- Place the damper where the vent meets the outside wall.
- Make sure it opens only when the appliance runs.
- Prevent insects, cold air, and moisture from entering.
- Clean the damper yearly to remove buildup or debris.
6. Position vent exits away from soffits or windows
Make sure your vent doesn’t blow air under a soffit or near a window. Hot air, steam, or fumes can rise and get trapped there, which may cause problems later.
During a kitchen renovation, always place vent exits on a clear, open section of the exterior wall. Keep them far enough from anything that could trap air or pull it back into the house. This also helps with looks and airflow.
- Place vent outlets at least 3 feet from any window or soffit.
- Avoid blowing air near rooflines or covered eaves.
- Keep the vent area open to allow air to escape freely.
- Follow your local code for proper spacing and location.
7. Allow at least 2″ clearance from combustible wood
Heat from a cooktop, burner, or fan speed on high can warm up surrounding surfaces. That’s why it’s important to keep at least two inches of space between your vent and any flammable wood parts.
This includes areas like the corner cabinet, mantel, or upper cabinet. Follow the manufacturer’s installation requirements to stay safe and help your appliance last longer.
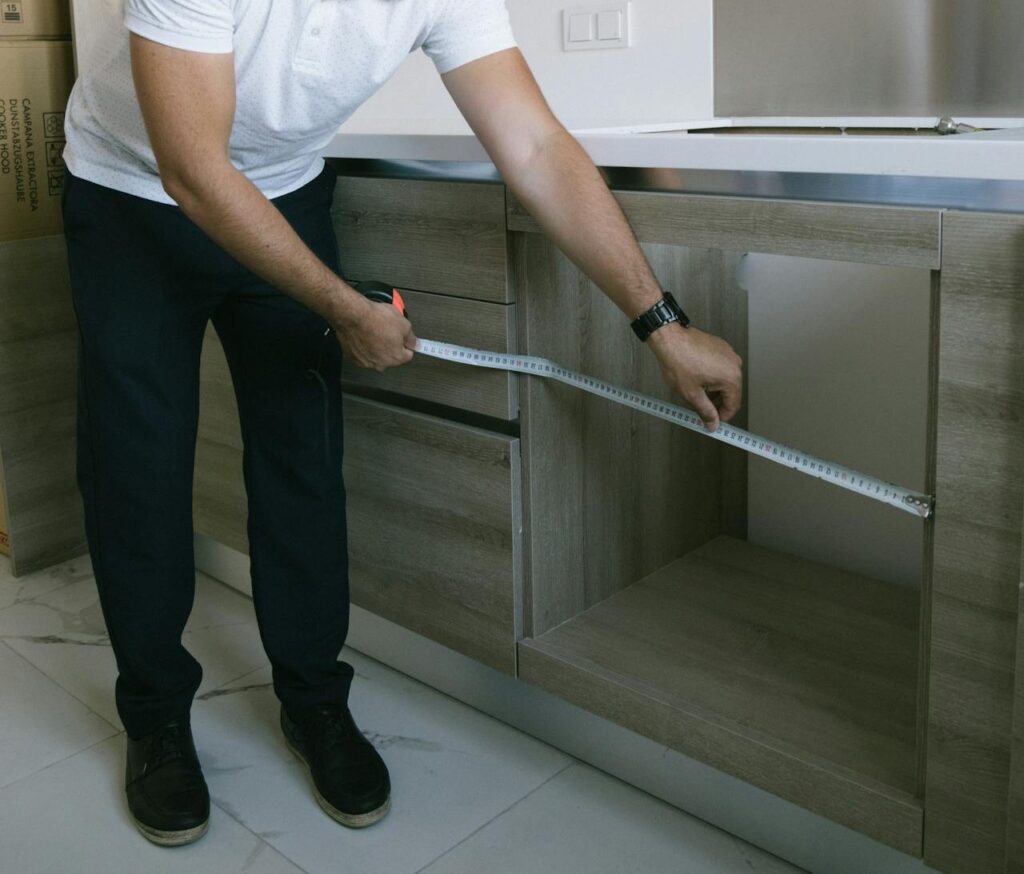
- Measure the space between ducts and wood trim or framing.
- Leave a 2-inch gap between ducts and materials like plywood or studs.
- Use metal spacers or fire sleeves if space is tight.
- Check your appliance manual for clearance requirements.
8. Use a vent grill that matches CFM of the appliance
A small vent or grill that’s too tight can block airflow. Always choose a vent cover that matches the CFM (cubic feet per minute) rating of your fan or appliance.
This is especially important with range hoods or systems that pull a lot of air. If the grill is too small, the air can’t escape fast enough, which puts strain on the ductwork and can lead to overheating or noise.
- Check the appliance’s CFM (cubic feet per minute) rating.
- Pick a vent cover that can handle that airflow without restriction.
- Avoid small grills that cause noise or reduce fan performance.
- Clean the grill often to maintain proper airflow.
9. Drill pilot holes to avoid splintering cabinetry
Before you drill large holes for your vent or duct, always start with a small pilot hole. This helps guide the drill and keeps the wood from splintering.
It’s an easy step, but it makes a big difference—especially if you’re working with finished cabinetry, a base cabinet, or the top of the cabinet. It also helps keep your power tools from jumping or getting stuck.
- Mark your hole locations before using larger drill bits.
- Use a small bit first to guide the cut and protect the finish.
- Clamp a scrap board behind the hole for cleaner results.
- Go slowly with power tools to avoid damage to panels or doors.
10. Secure ducts with metal clamps, not zip ties
Zip ties might seem quick, but they’re not made to handle heat or pressure. Instead, use metal clamps to hold your ducts in place.
These clamps create a firm grip and work well in tight spots behind a farmhouse style upper cabinet or under a modern kitchen hood. When you attach to the wall, clamps help prevent the duct from slipping or coming loose over time.
- Choose adjustable steel clamps for a tight, long-lasting fit.
- Position clamps at each joint or connection.
- Tighten with a screwdriver or nut driver—not too loose, not too tight.
- Skip plastic zip ties; they break down in heat and don’t hold well.
11. Check for obstructions before final enclosure build
Before you close up walls or seal the back of a custom made cabinet, take time to check the vent path. Look for anything blocking the airflow, like a joist, a stud, or extra framing.
This is especially important if you’re working around tricky features like downdraft vents or cooktops with high BTU output. Fixing obstructions early saves you from cutting back into the wood later.
- Look for studs, wiring, or plumbing behind walls before cutting.
- Use a stud finder or inspection camera if needed.
- Plan your duct path before framing or sealing cabinets.
- Double-check fit around corners or tight cabinet backs.
12. Make vent covers removable for cleaning access
Dust, grease, and vapor can build up inside vents over time—especially in a commercial kitchen setup or behind a wood mantel above the stove.
Make sure the vent cover is easy to remove for regular cleaning. This helps keep air moving and reduces fire risk. In a kitchen organization plan, mark these spots clearly so they don’t get blocked by baskets or shelving.
- Choose covers with clips, screws, or snap-in designs.
- Avoid sealing vent exits permanently with caulk or glue.
- Leave room to reach the inside with a brush or vacuum.
- Set reminders to clean covers and nearby duct ends yearly.
13. Label vent paths clearly for future maintenance
Once your vent is in place and hidden behind panels or walls, it’s easy to forget how it runs. Use a simple label or sticker near the vent entry or exit that says where the duct goes.
This helps anyone doing future work—like HVAC service or carpentry repairs—know what’s inside. It’s a smart step, especially in a new kitchen where lots of systems run behind the scenes.
- Use a label or sticker near each access point.
- Include notes like where the vent runs and what it serves.
- Mark ducts that run behind walls, ceilings, or built-ins.
- Help future you—or your installer—know what’s behind the scenes.
14. Use fire-rated ducting when venting through walls
If your duct passes through a wall or ceiling, always use fire-rated ducting. These ducts are tested to handle high heat without spreading flames.
This is very important when venting near flammable items like wood grain paneling or older builder grade framing. Fire-rated ductwork adds a layer of safety in homes and is often required by code.
- Look for UL-rated ductwork made for in-wall use.
- Follow code when passing through drywall, insulation, or framing.
- Use firestop collars where required.
- Protect nearby materials like drywall or framing from heat.
15. Slope horizontal runs slightly downward to outside
When air moves through a horizontal duct, some vapor or condensation can build up. To help it drain safely, make sure the duct slopes slightly downward toward the outside. It doesn’t need to be a big angle—just enough to guide water out.
This helps protect your carpentry, prevents water from pooling, and avoids damage to walls or insulation.
- Angle duct runs at about ¼ inch per foot toward the exit.
- This helps moisture drain instead of pooling.
- Keep the slope consistent—no dips or sags.
- Use wall brackets to support the duct and hold the slope.
Conclusion
Custom woodwork can make your home look great, but it should also work well with your appliances. Safe venting isn’t just a “nice to have”—it’s a must.
When done right, it protects your home, your health, and your hard work. The good news? With a bit of planning and the right tools, it’s totally doable.
Now that you know the basics, you’re ready to tackle your project with confidence!
FAQs
How do you ventilate a built-in refrigerator?
Ventilate a built-in refrigerator by leaving proper space for airflow, usually above, below, and behind. Drill holes or slots in the cabinetry behind or above the fridge to help hot air escape. This keeps the fridge cool and efficient.
Do built-in fridges need ventilation?
Yes, built-in fridges need ventilation to prevent overheating. Without airflow, heat builds up behind the doors or cabinets, which can damage the fridge and raise energy use.
Do refrigerators need air space around them?
Refrigerators need air space, especially vertical clearance and behind the wall behind them. Check the manual for exact distances to avoid overheating and ensure good performance.
What happens if the fridge has no ventilation?
If a fridge has no ventilation, it can overheat and break down faster. Lack of airflow causes the compressor to work harder, which may lead to higher energy bills and damage due to heat buildup.
How do you vent appliances safely in custom woodwork?
Use metal ducting, seal joints with foil tape, and keep vents short and straight. Always allow clearance around combustible wood and position vent exits away from windows or soffits for safety.
What are some easy kitchen remodel venting tips?
Plan vent routes before building cabinets, drill holes carefully, and use removable vent covers for cleaning. These small steps keep your kitchen safe and look great.
How do appliance garages affect venting?
Appliance garages need proper venting with clear airflow paths behind the doors. You may need to cut extra holes or use a filter type vent to avoid overheating your appliances.
Can custom woodwork overpower kitchen ventilation?
Yes, dense cabinetry or fine furniture can overpower airflow if vent paths are too small or blocked. Proper vent design and adequate spacing prevent this issue.
What are common mistakes when venting custom cabinets?
Common mistakes include using flexible plastic hose, not sealing joints, and placing vents near soffits or windows. These lead to poor airflow and potential damage.
Why is vertical clearance important for appliance vents?
Vertical clearance allows heat to rise and escape safely. Without enough space above appliances, heat can build up and cause damage to cabinetry or affect performance.
What tools do I need to make a vent in woodwork?
You’ll need power tools like drills for pilot holes, jigsaws for cutting, and screwdrivers for attaching vent covers. Take care to drill holes to avoid splintering fine furniture surfaces.
How often should I clean vents in custom cabinetry?
Clean vents every 6-12 months, depending on appliance use. Removable vent covers make this easy, preventing dust and grease buildup that can damage woodwork.
Are in-line fans good for venting appliances in tight spaces?
Yes, in-line fans help move air in tight areas like behind cabinets or inside appliance garages. They increase airflow without needing large vent openings.
How do I prevent damage due to poor appliance venting?
Prevent damage by maintaining clearance from combustible wood, sealing ducts well, and ensuring vent covers allow airflow. Regular cleaning helps avoid moisture buildup that harms wood.
What design ideas help with venting in a modern farmhouse vibe kitchen?
Use wide, visible vent hoods, keep ductwork simple and straight, and place vents thoughtfully to match the style. Open shelving or wood mantel accents can integrate vents without hiding them.