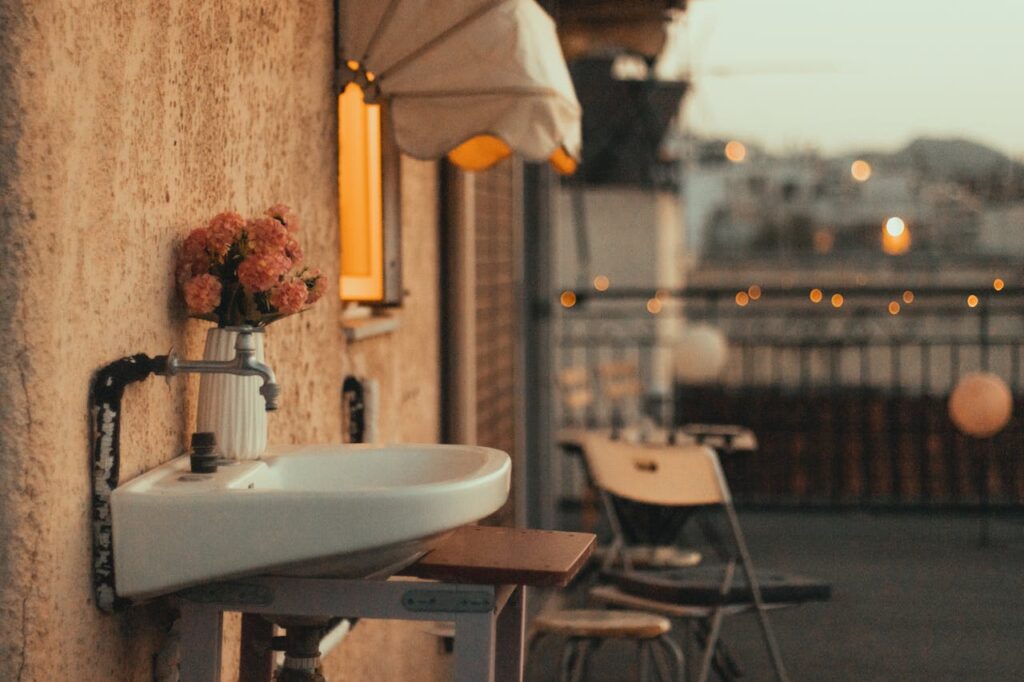
Installing an outdoor sink can be a great way to make your backyard more useful and fun. Whether you like gardening, cooking outside, or just want a place to wash your hands after playing, an outdoor sink can help. It might sound tricky, but with the right steps and tools, anyone can do it!
This article will walk you through how to install an outdoor sink step by step. We will also help you choose the best faucet to go with it.
By the end, you’ll feel ready to start your own outdoor sink project!
Key Takeaways
- Plan carefully where to place your outdoor sink for easy water access and good drainage.
- Choose a faucet that fits outdoor use, like one that can handle weather and water pressure.
- Gather all tools and materials before starting to make the job smoother.
- Follow simple plumbing steps to connect your sink to water and drainage safely.
- Test everything after installation to make sure your sink works well and doesn’t leak.
Is an Outdoor Sink Right for Your Space?
Before you start buying tools or picking out faucets, it’s important to think about your space. Not every backyard or patio is perfect for an outdoor sink. Let’s look at some key things to ask yourself. These will help you decide if an outdoor sink is a good idea for your home.
1. Do You Have Enough Room?
An outdoor sink needs space. You don’t want it to crowd your yard or block paths where people walk. Think about where you usually spend time outside. Do you have a spot near your grill, garden, or outdoor table? That’s often the best place for a sink.
Try to find a flat area. This makes it easier to install the sink and keeps water from spilling or pooling around it.
2. Can You Get Water to the Sink?
The sink needs a water source to work. Usually, you connect it to your home’s water pipes. Check if you have a hose or water pipe nearby. If not, you might need to hire a plumber to add one. This can add time and cost to your project.
If you plan to use the sink only sometimes, another option is a portable water tank. But this means filling the tank regularly, which can be less convenient.
3. How Will You Handle Drainage?
Water needs to drain away after you use the sink. Otherwise, puddles or mud can build up. Ask yourself where the water will go. You might connect the sink to your home’s sewer system, or use a drainage pipe that leads to your garden or a safe spot.
If your yard is very rocky or dry, drainage can be tricky. Sometimes you need to dig a small trench or install a special drain.
4. What Will You Use the Sink For?
Think about why you want an outdoor sink. Do you want to wash vegetables from your garden? Clean your hands after working outside? Or maybe you want it for washing dishes when you cook on the grill.
Knowing how you’ll use the sink helps you pick the right size and features. For example, if you wash big pots, you’ll want a larger sink basin. If you mostly wash hands, a smaller sink will work fine.
5. How Much Maintenance Are You Ready For?
Outdoor sinks need some care. Water can freeze in cold weather, so you might have to drain the pipes in winter. Dirt and leaves can get inside, so cleaning the sink regularly is important.
If you don’t want much work, pick a simple design with fewer parts that can break. Stainless steel sinks are popular because they are strong and easy to clean.
Tools and Materials You’ll Need
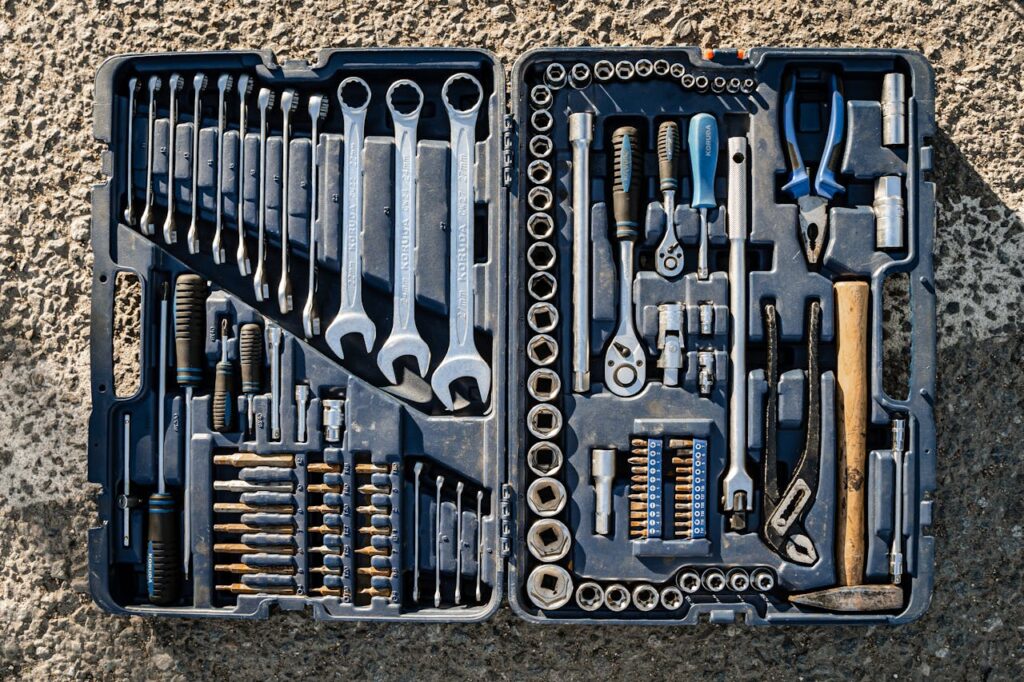
Before you start installing your outdoor sink, it’s important to have the right tools and materials. This makes the work easier and helps you avoid mistakes.
Here’s a detailed list of what you’ll need.
Tools
- Adjustable wrench: This helps you tighten and loosen nuts and bolts on pipes and faucets.
- Pipe wrench: It gives extra grip for bigger plumbing pipes.
- Screwdriver: You’ll need this to attach parts or secure the sink to a stand or wall.
- Drill with bits: Use it to make holes for screws or pipes if needed.
- Measuring tape: Accurate measurements help everything fit just right.
- Level: To make sure your sink is straight and won’t spill water.
- Pipe cutter or hacksaw: If you need to cut pipes to the right length.
- Teflon tape: This tape helps seal pipe threads so water doesn’t leak.
- Bucket and towels: For catching water spills during installation.
Materials
- Outdoor sink basin: Pick a sink designed for outdoor use. Stainless steel or heavy-duty plastic work well.
- Faucet: Choose a faucet made for outside. It should resist rust and handle changing temperatures.
- Water supply pipes: These bring water to your sink. PVC or copper pipes are common choices.
- Drain pipes: Pipes to take water away safely.
- Pipe fittings: These include elbows, connectors, and valves needed to join pipes and control water flow.
- Mounting stand or countertop: Something sturdy to hold the sink. You can buy a stand or build one from wood or metal.
- Sealant or plumber’s putty: Helps create watertight seals around sink edges or joints.
Choosing the Right Location for Your Sink

Finding the best spot for your outdoor sink is a key step. A good location makes your sink easy to use and keeps your yard safe and clean. Here’s how to pick the right place.
1. Find a Spot Near Water Supply
Your sink needs water. Look for a location close to your garden hose or outdoor water pipe. This makes connecting the water supply easier. If the spot is too far, you might have to dig or hire a plumber to extend pipes.
2. Consider Drainage
Water from your sink has to go somewhere. Pick a location where drainage is simple. It’s best if water can flow into a drain, a garden bed, or a gravel area that lets water soak in. Avoid spots where water might collect and cause mud or slippery patches.
3. Think About Convenience
Place the sink where you will use it most. For example, near your grill if you cook outside often. Or next to your garden if you wash vegetables and tools. This saves you steps and makes the sink more useful.
4. Check for Flat, Stable Ground
Your sink needs a firm, flat surface. This keeps it steady and prevents water from spilling. If the ground is uneven, you can build a small platform or stand to level the sink.
5. Consider Weather and Sun
While outdoor sinks are built to handle weather, placing your sink under a covered area or near a wall can protect it from heavy rain or strong sun. This can help it last longer.
Choosing the right tools and location sets you up for success. Next, we’ll explain the step-by-step process to install your outdoor sink safely and correctly.
How to Install an Outdoor Sink (and Choose a Faucet)
Installing an outdoor sink can make your backyard more useful and fun. No matter if you’re washing veggies, rinsing tools, or cleaning up after grilling, a well-planned sink adds convenience.
This section walks you through important steps on how to install an outdoor sink to set everything safely.
Pick a sink material that withstands weather well.
Choose a sink material designed for outdoor use. Stainless steel and heavy-duty plastic are good choices because they resist rust and cracking. This is important since your outdoor kitchen sink faces sun, rain, and cold.
Unlike your interior kitchen sink, which stays protected inside the house, an outside sink needs tough material to last through all seasons. This helps avoid damage during winterizing and keeps your sink looking good year after year.
- Choose stainless steel or heavy-duty plastic sinks to resist rust and cracks.
- Avoid materials that fade or break under sun and rain.
- Check if the sink is designed for outdoor use specifically.
- Think about how easy it is to clean and maintain the sink material.
Choose a faucet rated for outdoor and freeze-proof use.
When choosing a faucet, look for one made to handle outdoor weather. A freeze-proof spigot helps prevent water lines from bursting in winter. These fixtures are built to connect to your home’s water supply and handle temperature changes.
Check with your local building department to see if you need a permit before installing new plumbing or adding an outdoor faucet. Using a faucet rated for outside use makes your sink easier to maintain all year long.
- Select faucets labeled as freeze-proof or frost-resistant.
- Look for materials like brass or stainless steel that resist corrosion.
- Confirm the faucet fits your existing plumbing and water pressure.
- Check if local codes require specific fixtures for outside water use.
Place the sink near an existing water line or hose bib.
To make installation easier, place your sink close to existing water lines or a hose bib. This reduces the need for installing new plumbing. You can connect the outdoor kitchen sink to your home’s plumbing system using flexible water lines or pipe.
Position the sink so you can also install the drain without extra digging. This step saves time and cost because you won’t have to run long drain lines or install a septic vent.
- Measure the distance to your home’s outdoor water supply before choosing a spot.
- Pick a location with easy access to drain water away safely.
- Avoid spots that flood or collect standing water after rain.
- Keep the sink close to your main outdoor work area for convenience.
Install a level base using concrete, pavers, or a frame.
A strong, level base keeps your sink stable and prevents spills. Use concrete, pavers, or a wooden frame built to hold the sink cabinet securely. Make sure the base is flat by using a level tool.
A stable base also helps when you install the drain and drain line. If your yard tends to stay wet, consider adding a french drain or dry well nearby to handle waste water safely and avoid pooling around your sink.
- Use a level tool to ensure the base is flat before securing the sink.
- Consider a concrete slab or sturdy pavers for long-lasting support.
- If using wood, build a strong frame that won’t warp or rot outdoors.
- Make sure the base allows easy access to plumbing connections underneath.
Secure the sink to the base with brackets or anchors.
Once your sink sits level, secure it with brackets or anchors to prevent movement. Drill holes into the base or wall for sturdy mounting. Securing your outside sink is important, especially if you use it often for washing vegetables or rinsing dishes from your dishwasher.
Make sure the sink drain connects properly to a drain line and includes one trap to prevent odors. This step-by-step instruction will keep your outdoor kitchen sink safe and functional.
- Drill holes in the sink cabinet or stand and the base for strong attachment.
- Use rust-resistant brackets or anchors made for outdoor use.
- Double-check that the sink sits level before tightening brackets fully.
- Secure connections tightly to prevent wobbling or shifting over time.
Use a Y-splitter to connect to an outdoor spigot.
To connect your water supply, use a Y-splitter on an existing outdoor spigot. This lets you share water between the sink and a garden hose without changing your plumbing.
It’s a simple way to add water without installing new pipes. Before you start, check local codes to make sure this setup meets safety rules. A Y-splitter helps you control water flow while learning how to install an outside sink.
- Attach the Y-splitter firmly to avoid leaks when connecting water lines.
- Make sure the splitter has shutoff valves for easy water control.
- Choose a Y-splitter compatible with your spigot size and thread type.
- Use Teflon tape on threads to create a watertight seal.
Run PEX tubing or garden hose to the faucet lines.
After the splitter, run PEX tubing or a heavy-duty garden hose from the spigot to the faucet lines. PEX tubing is flexible and durable, making it easy to work with and good for underground runs.
Keep the tubing close to ground level to avoid kinks. If you use a garden hose, make sure it’s rated for drinking water to keep your sink clean and safe.
- Measure and cut tubing or hose to the exact length needed.
- Secure tubing along ground level to prevent kinks and damage.
- Choose PEX tubing for durability and long-term use underground.
- Use hose clamps or connectors rated for outdoor water lines.
Install shut-off valves before connecting water lines.
Install shut-off valves on each water line before they reach the faucet. These valves let you stop water flow quickly for repairs or winterizing. It’s smart to have a shutoff near the sink and another near the spigot for safety.
This also helps prevent backflow, which keeps your home’s water clean and separate from outdoor water.
- Place shut-off valves close to the sink and spigot for easy access.
- Use valves that turn smoothly without leaks.
- Label valves clearly for quick identification during emergencies.
- Shut off water supply before starting any plumbing work.
Seal faucet and sink connections with plumber’s tape.
When connecting the faucet and sink, wrap plumber’s tape around all threaded joints. This tape creates a tight seal that stops leaks and drips. Tighten connections carefully but don’t overdo it—you don’t want to damage the threads.
Proper sealing is key to a long-lasting sink and helps prevent water from getting behind walls or into your home’s plumbing system.
- Wrap plumber’s tape clockwise around all threaded pipe ends.
- Use 2 to 3 layers of tape for a strong, leak-proof seal.
- Avoid overlapping tape onto unthreaded parts.
- Check connections for leaks after tightening.
Connect a drain pipe or bucket for graywater runoff.
Next, connect a drain pipe from your sink’s drain to a proper disposal area, like a wall drain, sewer line, or cleanout. Use a 1.5 inch pipe for good flow. If you don’t have drainage access, you can drain the sink into a bucket and empty it manually.
For yards, a dry well or french drain can safely handle graywater runoff. Make sure the drain is at the right slope to flow away from your home.
- Use a 1.5-inch drain pipe for smooth water flow from the sink.
- Position the drain pipe with a slight downward slope away from the house.
- If no sewer or drain line is available, use a bucket to collect runoff.
- Consider installing a dry well or french drain for yard drainage.
Use silicone caulk to seal around sink edges.
After positioning your sink, apply silicone caulk around the edges where it meets the countertop or stand. This seal stops water from leaking into gaps that could cause damage or mold.
Before applying, dry-fit the sink to make sure it fits perfectly. Silicone also helps keep cleanup easy by preventing dirt and bugs from sneaking in. It’s a small step that protects your outdoor sink for years.
- Apply a bead of silicone caulk evenly where the sink meets the countertop.
- Smooth the caulk with a wet finger or tool for a neat finish.
- Let the caulk dry fully before using the sink.
- Reapply caulk every year or if cracks appear.
Flush the faucet to clear debris before regular use.
Before using your faucet for the first time, turn the water on full blast for a few minutes. This flushes out any debris from the pipes or moving existing plumbing parts.
Cleaning out particles helps avoid clogs and keeps your faucet working smoothly. If you plan to add a garbage disposal later, flushing first will protect it from damage caused by dirt or small stones.
- Turn the water on fully and let it run for a minute or two.
- Check that no dirt or particles come out with the water.
- Flushing protects the faucet and any attached devices, like a dishwasher.
- Perform this step after winterizing or long periods of disuse.
Test all connections for leaks and tighten if needed.
Once everything is connected, test your outdoor sink by turning the water on slowly. Check all joints, faucets, and drain connections for leaks. If you spot drips, turn the water off and tighten fittings or add plumber’s tape.
Leaks waste water and can damage your sink cabinet or nearby surfaces. This careful check saves you from bigger problems later.
- Turn on water slowly and watch every joint and fitting.
- Use a dry cloth to check for moisture at connections.
- Tighten nuts and fittings carefully if leaks appear.
- Don’t overtighten—this can damage threads or fittings.
Add a cover or insulation to protect in winter.
To winterize your outdoor sink, add a cover or insulation around the faucet and pipes. This keeps water from freezing inside and cracking your plumbing.
You can repurpose old towels, foam pipe covers, or buy special insulated covers. Don’t forget to drain the sink and turn off water supply to avoid ice damage during cold months.
- Use foam pipe insulation or an insulated faucet cover on pipes and spigots.
- Drain all water from the sink and plumbing before freezing weather arrives.
- Covering your sink helps avoid costly repairs from frozen pipes.
- Remove covers in spring to inspect and clean the sink.
Clean the sink regularly to avoid outdoor buildup.
Your outside sink faces dirt, leaves, and dust, so clean it often. Use mild soap and water to wipe the basin and faucet. Regular cleanup prevents buildup that can clog the drain or damage sink material.
If you notice leaves or debris near the drain, clear them away to keep water flowing smoothly.
- Wipe down the basin and faucet with mild soap and water weekly.
- Remove leaves, dirt, or debris from the drain area.
- Avoid harsh chemicals that might damage the sink material.
- Regular cleaning helps prevent clogs and keeps the sink looking fresh.
Conclusion
Now you know the basics of installing an outdoor sink and picking the right faucet. It’s not as hard as it seems, and you can do it with a little patience and the right tools.
Remember to think about where you want your sink, how to connect the water, and what kind of faucet fits your needs.
Once it’s done, you’ll have a handy place outside that makes cleaning and cooking easier. Enjoy your new outdoor sink—it’s a smart upgrade for your home!
FAQs
1. Does an outdoor sink need a drain?
Yes, an outdoor sink usually needs a drain to remove wastewater safely. You can connect it to a municipal sewer system or a grey water system like a dry well for sanitary disposal.
2. Can you have an outdoor sink without plumbing?
You can have an outdoor sink without plumbing by using a bucket or portable water supply. But to use supply lines and drain the sink properly, plumbing installation is needed.
3. Does an outdoor sink need an AP trap?
Yes, an AP trap or P-trap is needed to prevent sewer gases from coming back into your outdoor kitchen. It creates a water seal and keeps your space sanitary.
4. How to get water to an outside sink?
To get water to an outside sink, you need to connect supply lines from your home’s plumbing or use a garden spigot with a Y-splitter for easy water access.
5. How to install an outdoor sink drain?
Installing an outdoor sink drain means cutting a hole in the sink cabinet for the drain pipe, connecting it to a drain line, and making sure grey water flows safely into a sewer or dry well.
6. How to install an outdoor kitchen sink?
Install an outdoor kitchen sink by choosing the right sink material, placing it near existing plumbing, running supply lines, connecting a drain, and sealing all edges for weather protection.
7. How much does it cost to install an outdoor sink?
Costs vary but expect $200 to $700, depending on sink type, plumbing needs, and whether you hire a pro. Moving existing supply lines or installing new plumbing adds to the cost.
8. How to put a sink outside?
To put a sink outside, first cut a hole in your countertop or frame, connect water supply lines, install a drain pipe, and seal everything well. Check local codes and get permits if needed.
9. Do you need to install supply lines for an outdoor sink?
Yes, supply lines are essential for running water to your outdoor sink. You can tap into existing plumbing or use flexible hoses connected to an outdoor spigot.
10. Can you drain grey water from an outdoor sink?
Yes, grey water from your sink can be drained into a dry well or garden area, but it must not contaminate drinking water or sanitary sewer systems.
11. What is the easiest way to connect water to an outdoor sink?
The easiest way is using a Y-splitter on an outdoor spigot to share water between your garden hose and sink without major plumbing work.
12. Can you install an outdoor sink yourself?
Yes, with step-by-step instructions and basic tools, many homeowners learn how to install an outdoor sink safely. Always check local codes and permit requirements first.
13. What tools do you need to install an outdoor sink?
You’ll need a drill to cut holes, plumber’s tape for sealing, wrenches for tightening fittings, silicone caulk, and tubing or hoses for water supply lines.
14. How do you winterize an outdoor sink?
To winterize, shut off supply lines, drain all water, cover or insulate the faucet, and disconnect hoses to prevent freezing and damage.
15. What permits do I need for an outdoor sink?
Permit needs depend on your area but usually include plumbing permits if you’re connecting to your home’s sanitary sewer or moving existing plumbing. Check with your local building department.